Prologue
A month ago in Barcelona I was attending to r2con for the first time. This is the official congress of the radare2 community where everyone can learn more about radare2 framework and dive deep into different aspects of reverse engineering, malware analysis, fuzzing, exploiting and more. It also the place where all of us, the contributors and developers of radare2, can meet, discuss and argue about every other line of code in the framework.
This was the second congress of radare2, after the success of the first congress in last year which was also a celebration for radare’s 10 years old birthday. This year the conference was bigger, fancier and probably organized much better. r2con was four days long, starting at September 6 and lasted until September 9. The first two days were dedicated to training and took place at Universitat de Barcelona. The other two days were talks days and took place at the MediaPro.
Crackmes Competition
During r2con this year there was a Crackmes competition where all the attendees were given with the same 5 challenges and had to publish a writeups to all the challenges they had solved. The scoring was based on the quality of the writeups along with the quantity of solved challenges.
I won the competition and got myself some cool swag!
- Flag of radare2
- POC | GTFO book
- Orange PI with 3D printed case of r2con logo
- Radare2 stickers
- A beer 🍺
I thought of sharing some of my writeups with you, so you can taste a bit from what we had in the competition and so that others, coming from google, twitter and such, could learn how to use radare2 for solving different challenges. This article is aimed to those of you who are familiar with radare2. If you are not, I suggest you to start from part 1 of my series “A Journy Into Radare2”.
Getting radare2
Installation
Radare2’s development is pretty quick – the project evolves every day, therefore it’s recommended to use the current git version over the stable one. Sometimes the stable version is less stable than the current git version!
$ git clone https://github.com/radare/radare2.git
$ cd radare2
$ ./sys/install.sh
If you don’t want to install the git version or you want the binaries for another machine (Windows, OS X, iOS, etc) check out the download page at the radare2 website.
Updating
As I said before, it is highly recommended to always use the newest version of r2 from the git repository. All you need to do to update your r2 version from the git is to execute:
$ ./sys/install.sh
And you’ll have the latest version from git. I usually update my version of radare2 in the morning, while watching cat videos.
Let’s use radare2 to reverse engineer a Gameboy ROM!
Check it out @ https://t.co/g1kYJuShzE@radareorg #radare2 pic.twitter.com/7FJOB3SdKS— Itay Cohen (@megabeets_) October 9, 2017
Playing with Gameboy ROM
This post will describe how I solved simple.gb, a Gameboy ROM challenge written by @condret. It was actually my first time reversing a Gameboy ROM — and it was awesome!
First thing I did was to open the binary in radare2 and check for its architecture and format:
| $ r2 simple.gb — For a full list of commands see `strings /dev/urandom` [0x00000100]> i~format format ningb [0x00000100]> i~machine machine Gameboy |
The
icommand gives us information about the binary. Checki?for more commands.Tilde (
~) is r2’s internal grep.
Surprise, surprise, it is a Gameboy ROM — dah. After reading a bit about its instruction set we should go to the mission.
The obvious thing to do is open the ROM in an Gameboy emulator. I downloaded the good old emulator I used back in the days when I played Pokemon: VisualBoy Advance.
Let’s open the ROM in our emulator and see what we have:
Woops, wrong file. Bad habits… Let’s try again:
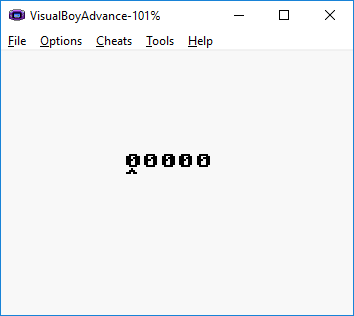
Cool! It’s a simple game where, by using the arrow keys, you increase/decrease 5 digits. We ‘simply’ need to find the correct password.
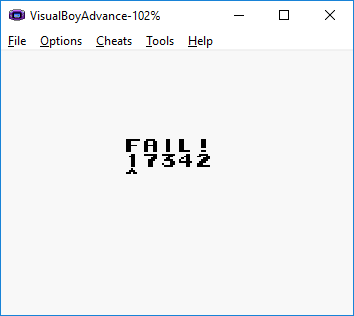
After randomly choosing digits and pressing the Enter key we receive the badboy message:
Okay let’s start analyzing the code and search for the function that checks our input:
| [0x00000100]> aaa [x] Analyze all flags starting with sym. and entry0 (aa) [x] Analyze len bytes of instructions for references (aar) [x] Analyze function calls (aac) [x] Use -AA or aaaa to perform additional experimental analysis. [x] Constructing a function name for fcn.* and sym.func.* functions (aan) |
Usually my plan in such cases is to start from the end, i.e from where the “FAIL!” message is printed. That’s because the checking function should probably be near by.
| [0x00000100]> izzq~FAIL 0x2f3 6 5 FAIL! |
izzqwould print us strings that exist in the whole binary,qis for quieter output.
Cool, now that we know the address of “FAIL!“ let’s find where it referenced from. Sadly xrefs doesn’t work this time so I did it the ugly way — grepping.
| [0x00000100]> pd 1024~2f3 0x000002e4 21f302 ld hl, 0x02f3 |
pdstands for print disassembly. Checkpd?for more commands.
We found that it referenced at 0x2e4 so let’s seek to this address and print the function:
| [0x00000100]> s 0x2e4 [0x000002e4]> pdf ┌ (fcn) fcn.00000274 107 │ fcn.00000274 (); │ 0x00000274 f802 ld hl, sp + 0x02 │ 0x00000276 5e ld e, [hl] │ 0x00000277 23 inc hl │ 0x00000278 56 ld d, [hl] │ 0x00000279 210400 ld hl, 0x0004 │ 0x0000027c 19 add hl, de │ 0x0000027d 4d ld c, l │ 0x0000027e 44 ld b, h │ 0x0000027f 0a ld a, [bc] <.. truncated ..>│ 0x000002bd fe01 cp 0x01 ; comparison │ 0x000002bf c2e402 jp nZ, 0x02e4 │ 0x000002d3 1803 jr 0x03 | 0x000002d5 c3e402 jp 0x02e4 ; jump to badboy │ ; JMP XREF from 0x000002d3 (fcn.00000274) │ 0x000002d8 21ee02 ld hl, 0x02ee ; another string │ 0x000002db e5 push hl │ 0x000002dc cd660f call fcn.00000f66 │ 0x000002df e802 add sp, 0x02 │ 0x000002e1 c3ed02 jp 0x02ed │ 0x000002e4 21f302 ld hl, 0x02f3 ; our badboy │ 0x000002e7 e5 push hl │ 0x000002e8 cd660f call fcn.00000f66 │ 0x000002eb e802 add sp, 0x02 │ ; JMP XREF from 0x000002e1 (fcn.00000274) └ 0x000002ed c9 ret |
sis used to seek to address and
radare recognized that our function begins at 0x274. We can see at the bottom some comparison, then it jumps to our badboy message or to another message which is a string at 0x02ee. Let’s see what string is hiding there:
| [0x000002e4]> ps @ 0x02ee WIN! |
psstands for print string.@is a temporary seek.
Great! We found our goodboy!
Let’s rename the function to check_input and start analyze it:
| [0x000002e4]> afn check_input 0x274 [0x00000274]> s check_input [0x00000274]> VV |
The
afncommand stands for analyze function name.VVwill open the Visual Graph Mode
I used Visual Graph mode for convenience, the function combined from a lot of jumps and if-conditions so it’s much more easier that way.
Use
pandPto toggle between the different visual modes.
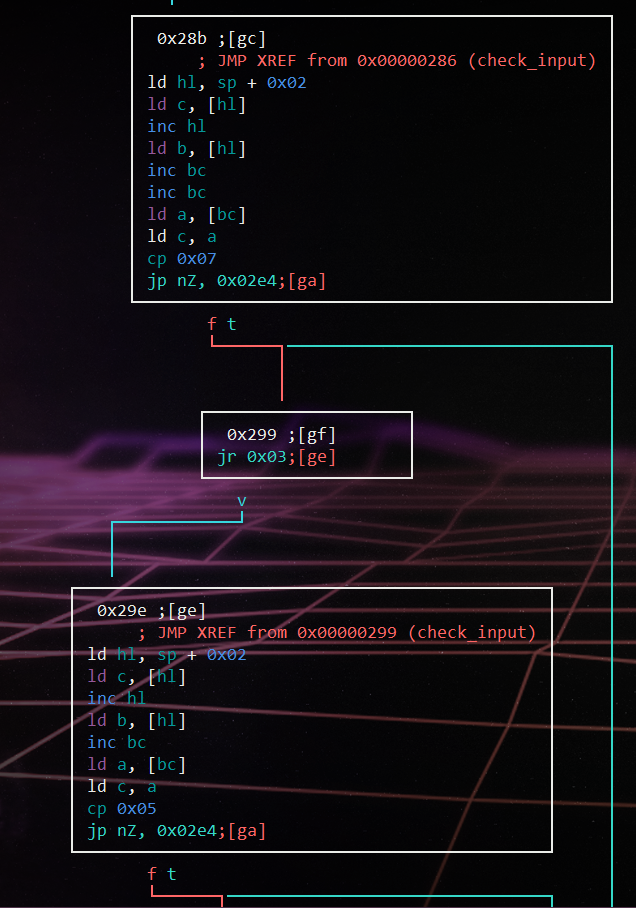
Seems like we found the place where the function checks each digit and compares it with the correct one. On the left we can see the flow of valid digits. Let’s have a quick view of the blocks. We’ll toggle again between the views using p until we reach the regular graph mode.
This is just a snip of the full graph since it is too long to put as an image.
From a quick view, and without fully understanding the instructions, it seems like the binary is checking whether the digit in each place is equals to a specific immediate value. It checks it by using cmp imm in this order: 3, 7, 5, 1, 9.
Hooray! That was so easy, let’s just enter this value and get the WIN! message:
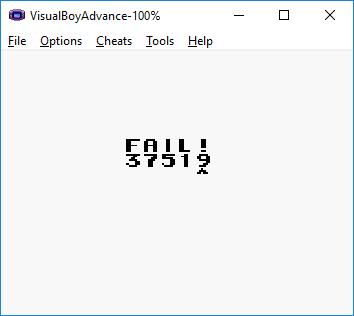
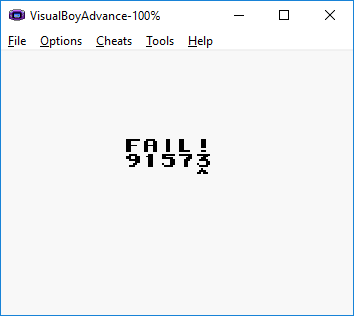
What? Fail?? Okay, okay, maybe the other way:
Bummer… So it’s not so easy after all. I probably need to have a closer look at this function.
After a while and a deeper understanding of the function and each condition (radare2 isn’t able to debug the program so it was even harder) I understood that the blocks are not so different from each other, except several lines. Although it’s a simple lines of code, the disassembly looked awful. the register bc is holding the address of our array and being manipulated during the execution of the program. All we had to do is to follow its changes and understand which digit is being checked in every block.
Let’s take a look on these blocks for example:
[0x000002e4]> pdf
/ (fcn) fcn.00000274 107
|   fcn.00000274 ();
|           0x00000274      f802           ld hl, sp + 0x02
|           0x00000276      5e             ld e, [hl]
|           0x00000277      23             inc hl
|           0x00000278      56             ld d, [hl]
|           0x00000279      210400         ld hl, 0x0004
|           0x0000027c      19             add hl, de
|           0x0000027d      4d             ld c, l
|           0x0000027e      44             ld b, h
|           0x0000027f      0a             ld a, [bc]
|           0x00000280      4f             ld c, a
|           0x00000281      fe03           cp 0x03
|       ,=< 0x00000283      c2e402         jp nZ, 0x02e4
|      ,==< 0x00000286      1803           jr 0x03
      ,===< 0x00000288      c3e402         jp 0x02e4                   ; fcn.00000274+0x70
|     |||      ; JMP XREF from 0x00000286 (fcn.00000274)
|     |`--> 0x0000028b      f802           ld hl, sp + 0x02
|     | |   0x0000028d      4e             ld c, [hl]
|     | |   0x0000028e      23             inc hl
|     | |   0x0000028f      46             ld b, [hl]
|     | |   0x00000290      03             inc bc
|     | |   0x00000291      03             inc bc
|     | |   0x00000292      0a             ld a, [bc]
|     | |   0x00000293      4f             ld c, a
|     | |   0x00000294      fe07           cp 0x07
|     |,==< 0x00000296      c2e402         jp nZ, 0x02e4
|    ,====< 0x00000299      1803           jr 0x03
    ,=====< 0x0000029b      c3e402         jp 0x02e4                   ; fcn.00000274+0x70
|   |||||      ; JMP XREF from 0x00000299 (fcn.00000274)
|   |`----> 0x0000029e      f802           ld hl, sp + 0x02
|   | |||   0x000002a0      4e             ld c, [hl]
|   | |||   0x000002a1      23             inc hl
|   | |||   0x000002a2      46             ld b, [hl]
|   | |||   0x000002a3      03             inc bc
|   | |||   0x000002a4      0a             ld a, [bc]
|   | |||   0x000002a5      4f             ld c, a
|   | |||   0x000002a6      fe05           cp 0x05
|   |,====< 0x000002a8      c2e402         jp nZ, 0x02e4
|  ,======< 0x000002ab      1803           jr 0x03
  ,=======< 0x000002ad      c3e402         jp 0x02e4                   ; fcn.00000274+0x70
At the first block, 0x4 is moved (ld instruction) to hl which in turn moved to register bc and then the value which is referenced in bc is compared to 0x3. As I said, bc points to our input so this check checks whether bc+4 is equals to 0x4. In the next block we can see that bc, which returned to its original value, now increased (inc) twice and the value it is referenced to is compared with 0x7. In the last block of our example, bc returns to its initial value and then incremented once and its referenced value is compared with 0x5..
Finally I came up with this pseudo Pythonic code:
def check_password (guess):
    if guess[4]==3 and guess[2]==7 and guess[1]==5 and guess[3]==1 and guess[0]==9:
        print "WIN!"
    else:
        print "FAIL!"
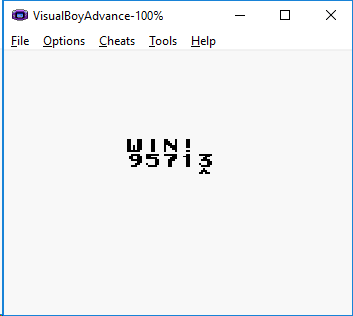
Let’s see if we got it right:
Yes! We did it and ended up with our beloved goodboy.
Epilogue
In this writeup I showed you more of the powers within radare2, this time its capabilities to analyze a non-trivial binary. Thanks condret and all of the great people in the radare community for this great challenge! Another thanks goes to all these angels who helped creating r2con this year, it was absolutely awesome.
If you want to learn more about radare2 I suggest you to start from the part 1 of my series “A Journy Into Radare2”.
As always, please post comments to this post or message me privately if something is wrong, not accurate, needs further explanation or you simply don’t get it. Don’t hesitate to share your thoughts with me



Are u using vbam from git?
I wonder why this works, bc I patched the rom, so that it should nat work on emulators, that do not do proper initialization of the registers.
Do you think I should mess with the character table next time?
Try the harder one too, it is really painful, so I want to see how far ppl get.
I didn’t use VBA-M, I used VisualBoy Advanced. It worked just fine. Tried with bgb which was also able to load the ROM.
But now that you’ve mentioned it, I did try to open it with VBA-M after our conversation on tlg and it did failed.
Tried the harder as well before we’ve talked first, the rc4 was a nightmare. I thought of writing a solution for it as well but it’d be quite complicated to explain it and requires some time for me to write it down.
I though it would fail in vba too, hm. Well I think i remember vba can be ffoled if you have a main, that is not at 0x150, like pokemon green does. Most gb emulators are bad coded (for bgb we don’t know). I did that trick for preventing ppl from using insecure vba and vbam https://www.youtube.com/watch?v=L-L8qWpd_74 But there is hope, i plan to make vbam or a fork of it use r2 under the hood for cpu-emulation, so that we have better code there, and a nice gb-debugger 😀
“I thought of writing a solution for it as well but it’d be quite complicated to explain it and requires some time for me to write it down.”
please please please make writeup for the harder one so we can learn more senpai.
that was awesome tut! thank you!
Great post!
But it doesn’t work if you’re dealing with real Game Boy ROMS since all text is non-ASCII and each letter is referencing different character table offsets.
This kind of things can only be achieved with relative search algorithms.
” As I said, bc points to our input so this check checks whether bc+4 is equals to 0x4″ . did you mean 0x3 instead of 0x4?
Good one! Thank you mister
Love pokemon gold and r2!
Hi, I understood all the post, the last explication even the pseudo code, however, not understand where do you get values from, (91573). I feel confusing with the comparations between bc+4=3, etc
Anyone could help me?
Thanks in advance